Android car dash
NOTE: This is an old page that reallly needs updating, but may have some relevant information still...
The Valvers Dash Project is an open hardware and open software project that implements a data interface to a CAN network and an Android tablet. Developing for Android is simple, with the main development language being Java. The API’s for Android are pretty good. This page describes getting started with Android Development.
Windows and Linux
Download the Android ADT Bundle which includes the SDK, Eclipse and the API’s. Once downloaded unzip to a hard drive.
Getting Started with Eclipse
Eclipse uses a folder, which it calls its workspace which you work with. It’s possible to import projects into a workspace without importing the files of a project. This can be useful in our case as we’re going to be working with a project that is under version control. Start eclipse and just accept the default workspace location, unless you wish to use multiple workspaces (groups of projects) in which case you might want to make a new folder and point eclipse to it so you know where you’re working. Sometimes it’s worth doing this to begin with, mess around a bit to get to know how to import projects and the like and then start a fresh.
Get an example project to start with rather than trying to start from scratch. For example, in a suitable directory checkout the valvers android dash project:
Now, startup eclipse from under the $ADT_ROOT/eclipse folder. Select the folder you want to use as the eclipse workspace. Some meta files and information is stored here only. Once eclipse starts you’ll get a screen that looks like this:
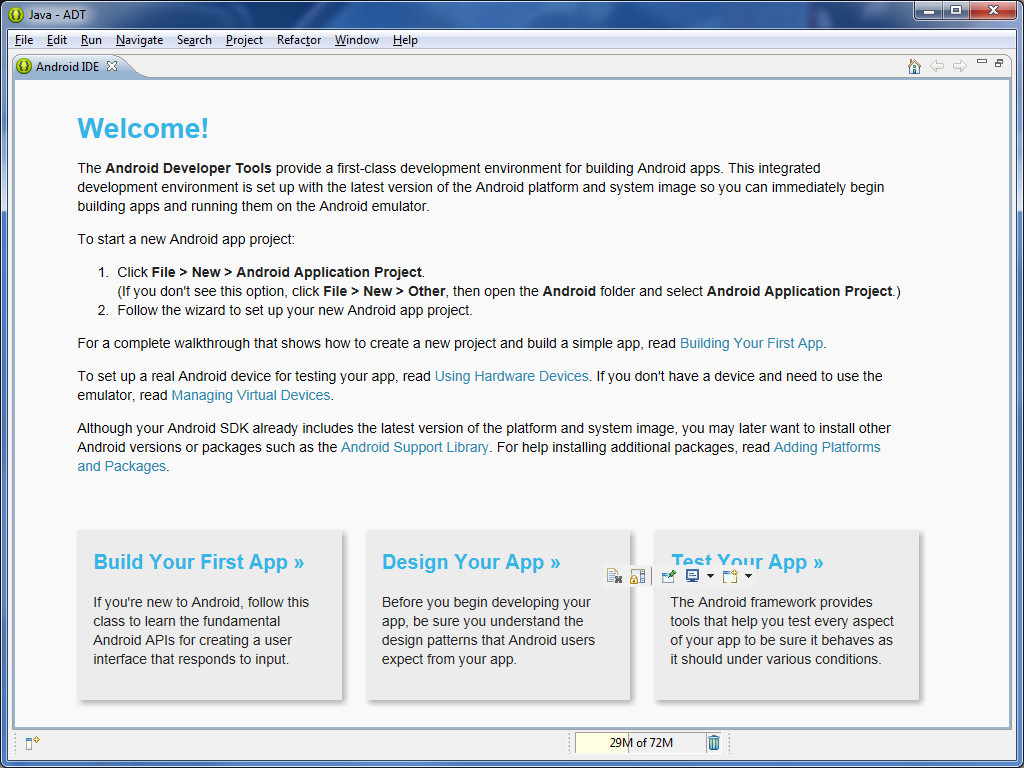
Close this window (The X next to the Android IDE tab title), and you’ll get the base eclipse perspective with the package explorer on the left and a code editing pane in the middle:
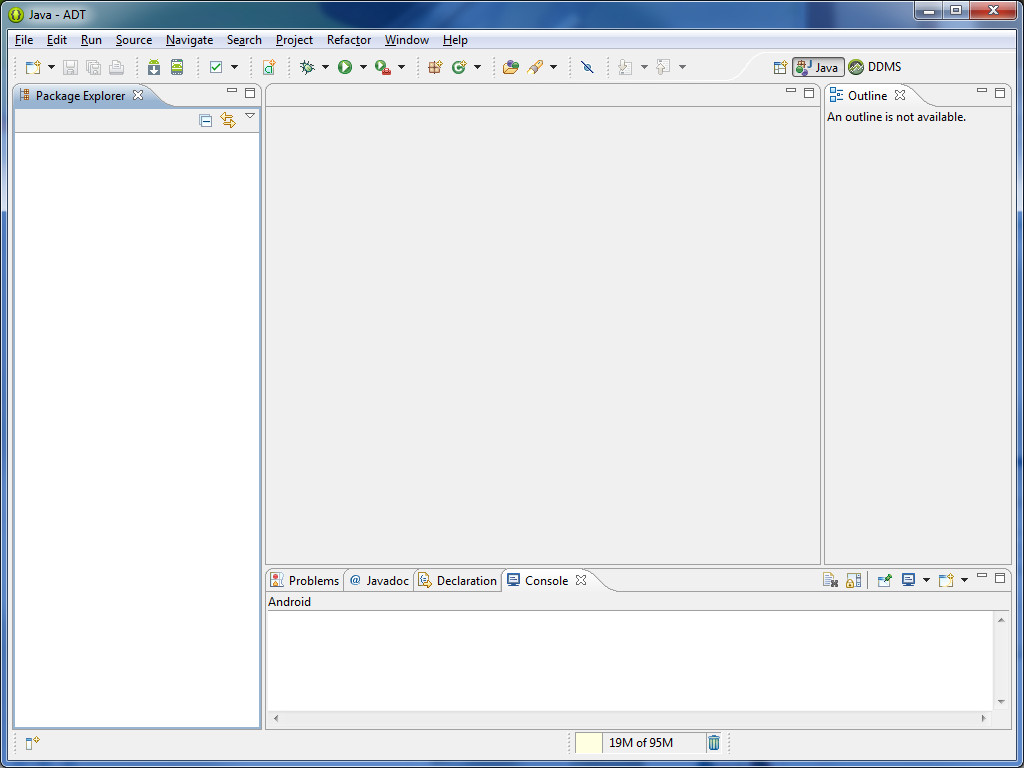
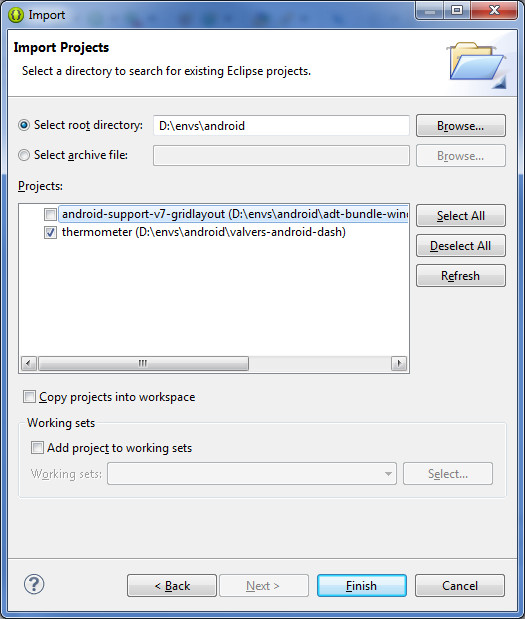
Import the valvers dash project using the File->Import menu. From the import dialog, select General->Existing Projects into Workspace and press next:

Select the folder where you checked out the valvers-android-dash project. This should be the folder above the valvers-android-dash folder, uncheck any other projects if they come up as you don’t need to import other projects at the same time!
Make sure you do not copy the files into the workspace as they are under version control and the hidden .bzr folder which contains the version control information will not get copied. Click finish to import the project. Now, the project will appear in the package explorer. In a new android-eclipse install you’ll have an error – unable to resolve target ‘android-8’. This means we do not have V8 of the android API’s installed. We will need to get the API’s in order to develop with them!

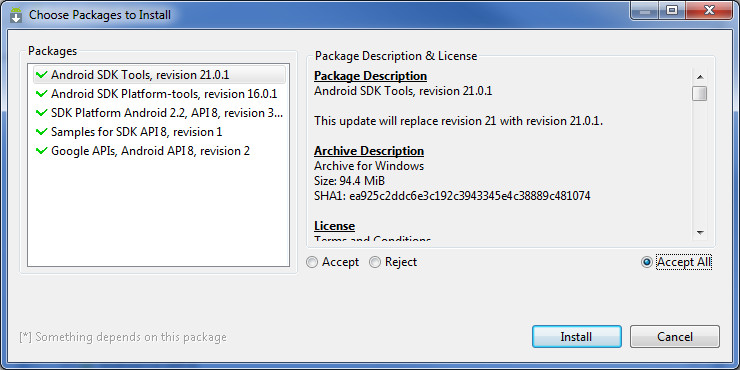
As can be seen, there is very little that is installed! The first thing to do is to update the Tools section if there is an update available. So check the main Tools checkbox to select all Tools to be updated. As we’ve noticed that API V8 is missing and is required by our project, we should also select the Android 2.2 (API 8) section to be installed too. Check that API level (and any other API level you’re interested in too!) and then click the install n packages button to start the installation and update process.
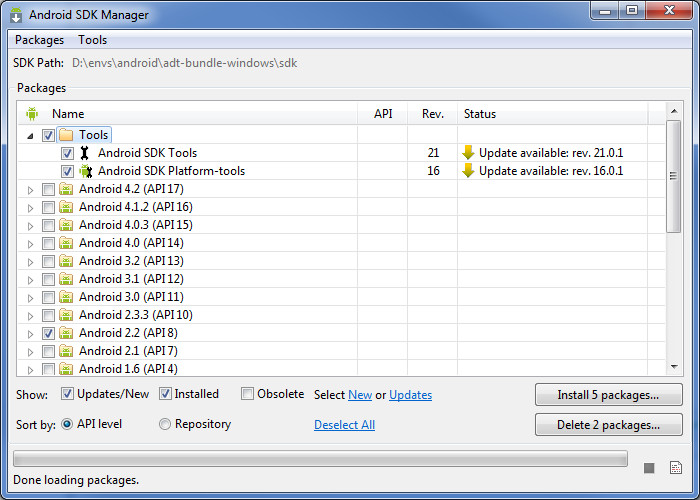
As the installation process must rename some folders and replace files that eclipse holds open, so close eclipse now before you click install so that the SDK manager installs the updates smoothly. You’ll have to select several licence terms and conditions before the SDK manager will actually install anything for you! Of course if you don’t agree you don’t have to and you can stop Android development here. It’s easiest to select Accept all without reading a thing and then clicking install...
Now have a cup of tea or coffee and wait a while whilst the API’s and Tools are installed and updated. Close the SDK Manager when it has finished.
Start eclipse again and you should have a project that builds without errors. Normally the project is built automatically any time a file is changed and saved. You can change this behaviour from the Project menu, uncheck automatic build and then select build all.
Developing on a Real Device
This is how I recommend developing. The virtual devices are really good, but sometimes you just can’t beat running your app on an actual device. In the case of the android-dash project we have to run it on an actual device anyway because the virtual machines do not include Bluetooth support.
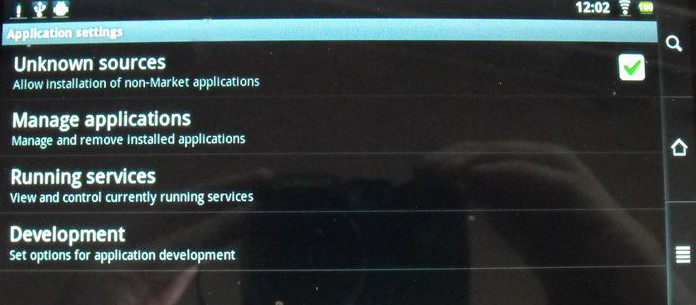
On your device make sure you have the ability to install packages from sources other than the marketplace:
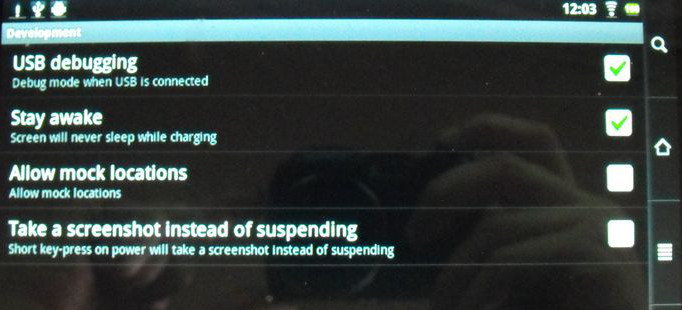
...and make sure you have USB Debugging enabled:
Make sure you have your android device plugged in via a USB port and then build the project if it is not already automatically built. Click the Debug icon in eclipse. You’ll be presented with a target selection dialog like this:
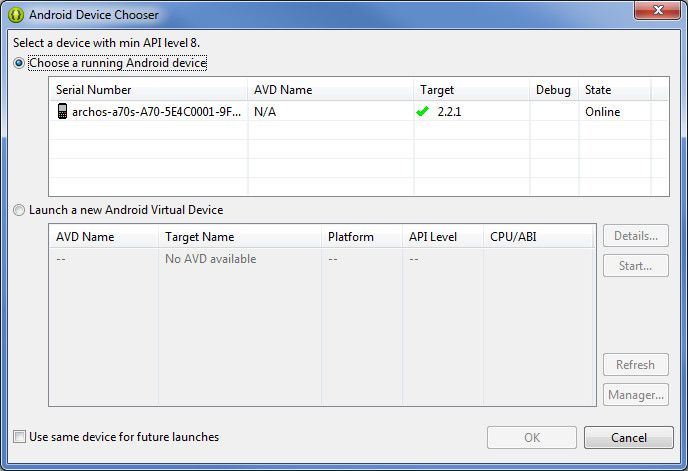
Select the device you want to run on and then click OK. the ADT (Android Development Tools) will package your app, install it on the device and launch it. If you have a lock screen enabled on your device, you’ll have to unlock your device to see your app running. When I run the android-dash project like this on my Archos 70 I can develop easily from within eclipse:

Bluetooth Serial Protocol
The Bluetooth serial connection profile is used to pass data from the ECU to the Dash. A quick and dirty protocol was devised to pass the data between the two:
Bluetooth data hack
-------------------

Preamble:

    0xFE, 0xFE, 0xFE, 0xFE, 0xFE, 0xFE

Data:

    0x12, 0x34  - RPM
    0x12, 0x34  - Battery Voltage (x10)
    0x12, 0x34  - Speed (KM)
    0x12, 0x34  - Fuel Pressure
    0x12, 0x34  - Oil Pressure
    0x12, 0x34  - Air Temperature
    0x12, 0x34  - Oil Temperature
    0x12, 0x34  - Water Temperature

    0x55 - End of packet ( ensures (sort of) data validity! )

    If this byte is not present, simply drop the packet, do not update the
    realtime values and wait for the next valid data packet

Bluetooth data protocol

All 0x55 characters are escaped by 0x55. So any valid 0x55 character will be
immediately repeated inside a packet. But for the start of a packet, only
one 0x55 character will be sent. This distinguishes a start character from
packet data.

uint8_t     Start Of Packet Byte

uint16_t [] = {
    uint16_t    Data Code ( See Below for data codes )
    uint16_t    Data
    }

The end of a packet is defined by the start (or re-sync) of a new start of
packet byte

0x55 - start of packet