ESP32 MQTT Tutorial
This is a tutorial for getting an ESP32 set up as an Amazon IoT device using MQTT to communicate.
Install Arduino IDE
No matter what your platform is, you'll need the Ardiuno IDE installed. It can be installed on many platforms including Linux, Windows and MAC.
Install ESP32 Support
Once installed, plug the ESP32 board into a USB port and start the Arduino IDE.
Select File->Preferences and then enter https://dl.espressif.com/dl/package_esp32_index.json in the Additional Board Manager URLs field.

Click OK
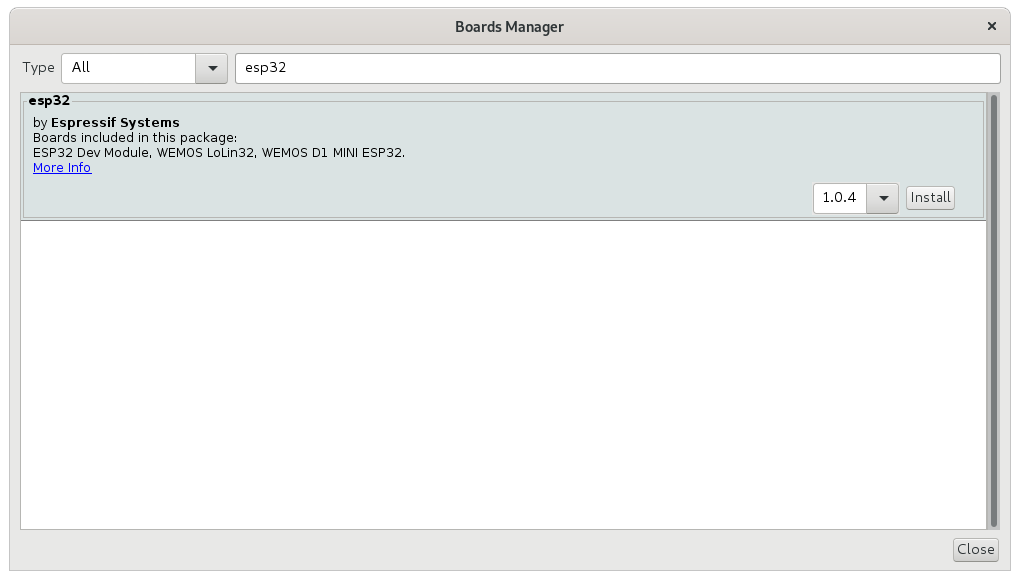
Select Tools->Board->Board Manager

Using the search feature, click Install for the ESP32 board support.
NOTE: The ESP tools require the
pyserialpackage to be installed in your default python installation. Depending on your system you can either use pip to install the pyserial package with something likepip install --upgrade --user pyserialor else you can get your distribution's packaged version of the python package with something likesudo dnf install -y python3-pyserialon Fedora for example.
Select the board (depending on what board you have!). For me, I've been posted a board to work with.
I've selected the standard ESP Dev Module as when I select Tools->Get Board Info the board comes back as unknown and so cannot be automatically detected as a supported Arduino board.
When you've selected your board, there is already an empty sketch loaded. You can now simply click Upload in order to compile the sketch and upload the sketch to the ESP32 device.
You should get a success message along the lines of "Done uploading" in the Arduino IDE.
Debug Output
Tip
If you're already familiar with Arduino and the IDE, etc. then you can safely skip this section.
To get started with the ESP (If you're not familiar with Sketches and Libraries) let's look at getting some debug output from the Sketch (Program) to prove to ourselves that the device is working and running our sketch.
The default sketch looks like this:
void setup() {
  // put your setup code here, to run once:

}

void loop() {
  // put your main code here, to run repeatedly:

}
Now, let's add some detail to make sure. Let's make use of a useful feature - that we have Serial communications available to us from within Arduino. From the documentation we can see the functions available for the Serial module.
Our new code looks pretty straight forward:
110-esp-arduino-debug-output.ino
110-esp-arduino-debug-output.ino
void setup() {
  // put your setup code here, to run once:
    Serial.begin(115200);
    Serial.print("Hello World!\n");
}

void loop() {
  // put your main code here, to run repeatedly:

}
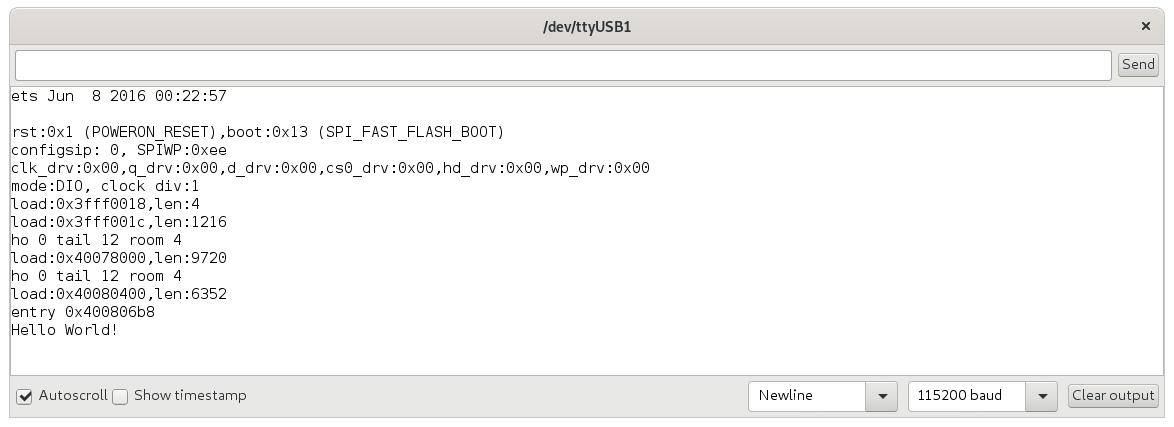
In order to see the output from our program open the Tools->Serial Monitor - the COM port should be set to the same one the board is set to. The BAUD rate might have to be adjusted for your board. Make sure the BAUD rate is set to the same as your board communications so you get to see all of the output.
Now, when we Upload the sketch to the ESP32, we can see the Hello World! output.
We're done getting set up with Arduino and our board
Connecting WiFi
First things first. In order to connect to an MQTT stream, we'll first need to be able to connect the ESP32 to a WiFi connection so we can connect to the internet.
As part of the ESP32 support we installed earlier, there was a library installed which is available to the sketch called WiFiClientSecure which provides a secure web client.
You can add this library to a sketch by selecting Sketch->Include Library->WiFiClientSecure. Information about this Arduino library can be found on GitHub: https://github.com/espressif/arduino-esp32/tree/master/libraries/WiFiClientSecure
The first thing we need to do is get connected to WiFi.
Let's modify the Sketch so we connect to the WiFi. We'll use the documented example as a reference sketch. However, we don't need a root CA in place for the moment as we've not created our own certificate authority or have any CA we need to trust.
120-esp-arduino-wifi-connection.ino
120-esp-arduino-wifi-connection.ino
#include <WiFiClientSecure.h>

const char* ssid = "your-ssid";
const char* wifipassword = "your-password";

WiFiClientSecure wifi;

void setup() {
  // put your setup code here, to run once:
    Serial.begin(115200);
    Serial.print("Connecting to SSID: ");
    Serial.println(ssid);

    WiFi.begin(ssid, wifipassword);

    while( WiFi.status() != WL_CONNECTED ) {
        Serial.print(".");
        delay(1000);
    }

    Serial.print("Connected to ");
    Serial.println(ssid);
}

void loop() {
  // put your main code here, to run repeatedly:
    Serial.print(":");
    delay(1000);
}
Go ahead and run that sketch, remembering to change the ssid and wifipassword variables to suitable settings for your network.
When you run the sketch, you will see output in the Serial Monitor similar to the following:
From here we can connect to the internet and make web queries, etc. We'd do that with the client object. For now, we don't need to do anything else really, we just need to get on with looking at moving forward with MQTT.
MQTT Library
We can install a library in the Arduino IDE for the MQTT client to get us MQTT support.
In the Arduino IDE click Tools->Manage Libraries... and enter MQTT into the search box.

Click Install to install the library. Make sure you use the Joël Gähwiler MQTT library.
Using a complete copy of a sketch from the MQTT library means that we can get connected to an MQTT client that is provided as a test ground.
130-esp-arduino-mqtt-example-shiftr.io.ino
130-esp-arduino-mqtt-example-shiftr.io.ino
// This example uses an ESP32 Development Board
// to connect to shiftr.io.
//
// You can check on your device after a successful
// connection here: https://shiftr.io/try.
//
// by Joël Gähwiler
// https://github.com/256dpi/arduino-mqtt

#include <WiFiClientSecure.h>
#include <MQTT.h>

const char ssid[] = "mrbanks";
const char pass[] = "mvepfgzw";

WiFiClientSecure net;
MQTTClient client(1024);

unsigned long lastMillis = 0;

void connect() {
  Serial.print("checking wifi...");
  while (WiFi.status() != WL_CONNECTED) {
    Serial.print(".");
    delay(1000);
  }

  Serial.print("\nconnecting...");
  while (!client.connect("bsidebotham", "try", "try")) {
    Serial.print(".");
    delay(1000);
  }

  Serial.println("\nconnected!");

  client.subscribe("/hello");
  // client.unsubscribe("/hello");
}

void messageReceived(String &topic, String &payload) {
  Serial.println("incoming: " + topic + " - " + payload);

  // Note: Do not use the client in the callback to publish, subscribe or
  // unsubscribe as it may cause deadlocks when other things arrive while
  // sending and receiving acknowledgments. Instead, change a global variable,
  // or push to a queue and handle it in the loop after calling `client.loop()`.
}

void setup() {
  Serial.begin(115200);
  WiFi.begin(ssid, pass);

  // Note: Local domain names (e.g. "Computer.local" on OSX) are not supported
  // by Arduino. You need to set the IP address directly.
  //
  // MQTT brokers usually use port 8883 for secure connections.
  client.begin("broker.shiftr.io", 8883, net);
  client.onMessage(messageReceived);

  connect();
}

void loop() {
  client.loop();
  delay(10);  // <- fixes some issues with WiFi stability

  // publish a message roughly every second.
  if (millis() - lastMillis > 1000) {
    if (!client.connected()) {
      Serial.print("lastError: ");
      Serial.println(client.lastError());
      connect();
    }
    lastMillis = millis();
    client.publish("/hello", "world");
  }
}
Warning
I created a GitHub issue for the fact that the example ESP32 code didn't work out-of-the box on an ESP32 development board
The above code is changed slightly from the actual example code. The buffer size for the MQTT client must be increased to get past the first message received from the shiftr.io MQTT server. After that first message, we receive the correct /hello world topic and message from the server which we subscribe to. For more information about MQTT, you can see the MQTT 3.1.1 documentation.
Amazon IoT
Tip
In this section, we'll make heavy use of the AWS documentation
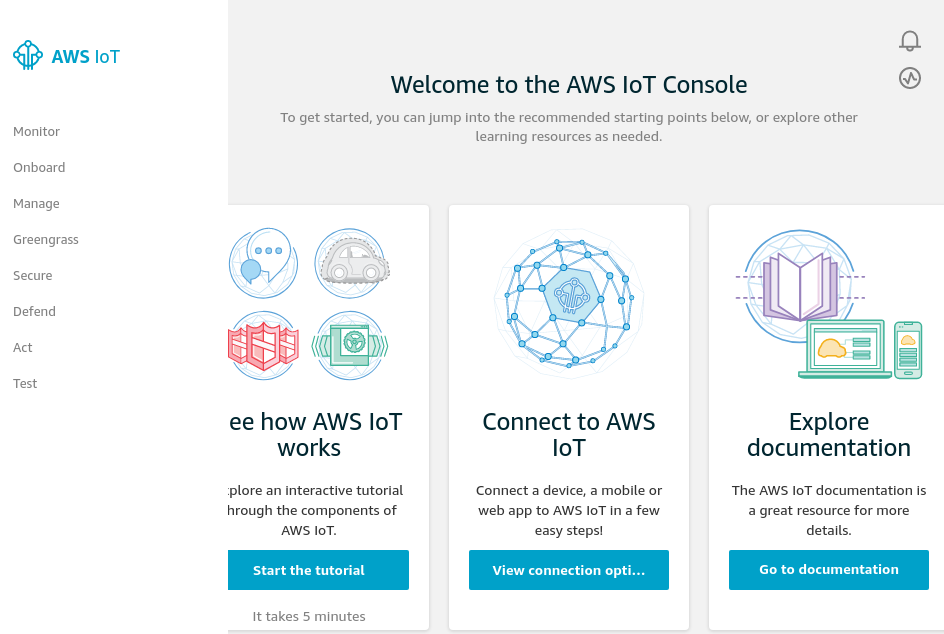
The AWS IoT service allows us to create secure MQTT endpoints for our own Internet-of-Things devices. Let's have a look at how to get our now-MQTT-enabled ESP32 connecting to our own AWS IoT service.
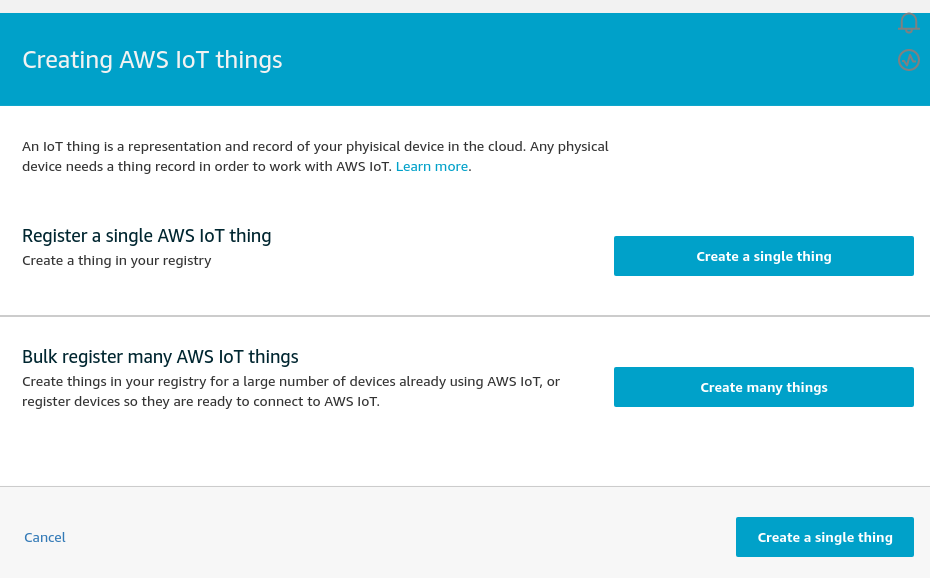
The first task is to create a Thing - that is, a unique device that will be able to connect to the service that we create later.
Click Manage
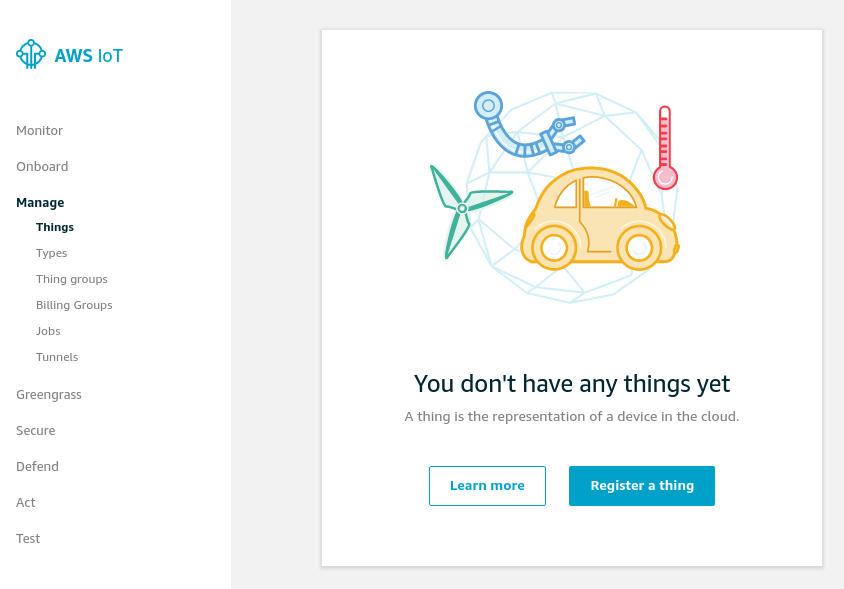
Click Register a thing
Name your thing something that is pertinent to this tutorial. I've gone for ESP32Example so that's what'll be in use throughout the rest of this tutorial.
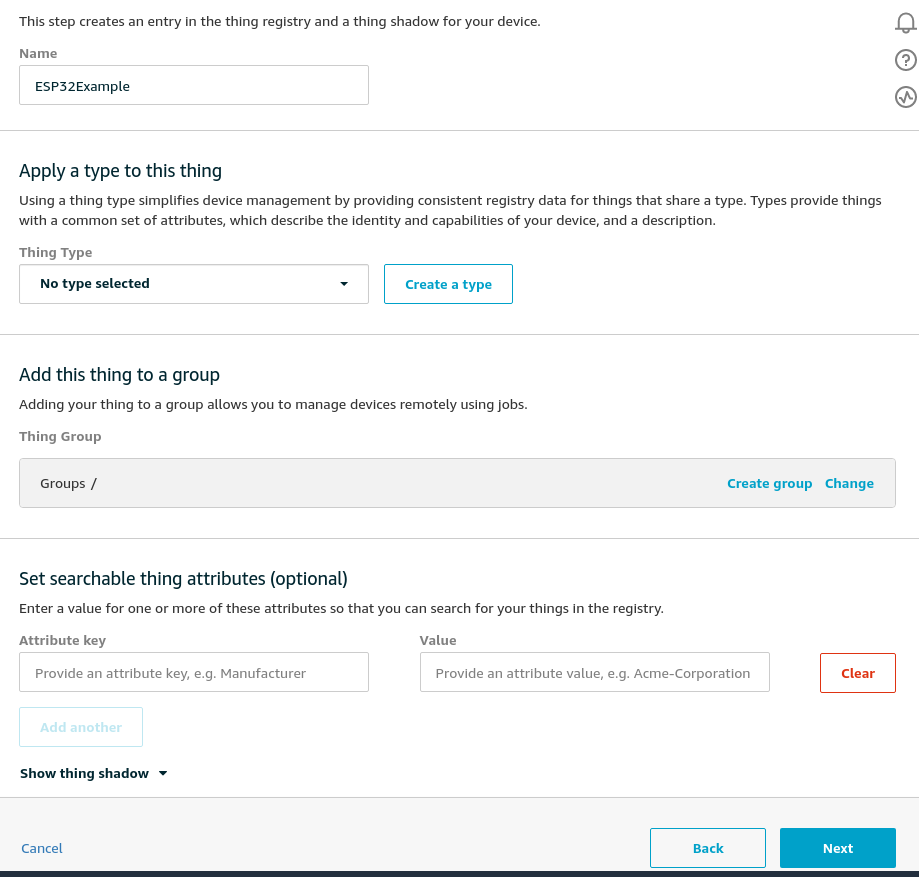
Click Next after you've inserted a name. There's no need to create a group or anything at this point.
Certificates. This is always a fun subject. You can end up tying yourself in knots with certificates. For the tutorial, I say - use the one-click certificate creation. That's what I'll do here for this tutorial, but generally for business I'd be using a CSR or (more likely) my own CA for IoT devices. Using your own CA puts you in a much better place.
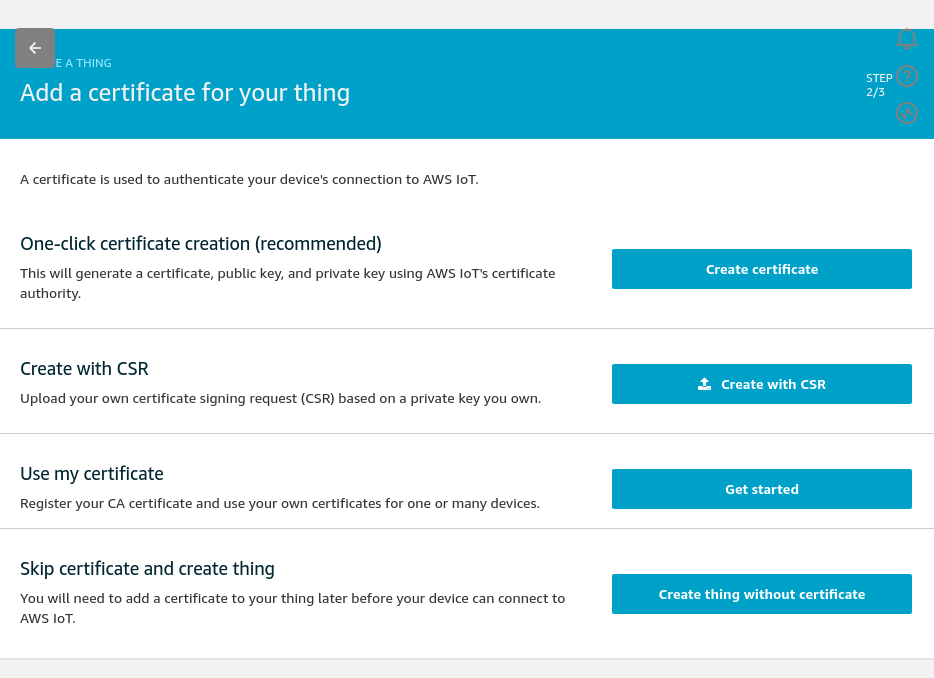
Click One-click certificate creation "Create certificate"
Pay attention to the next page - you only get one chance to download the public and private keys. Once you move away from the next AWS page you will not be able to download them again. Make sure you keep the certificate and private key out of other people's reach.
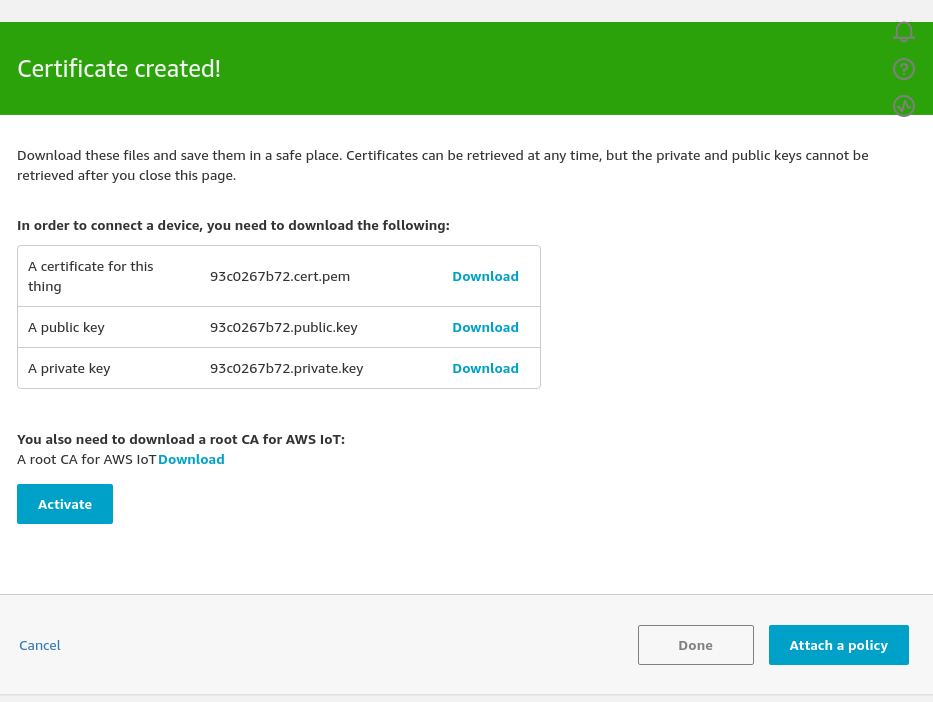
Download all three certificates
Go ahead and download the certificates and keys that have been created for your device.
You'll also notice that there is a link to the root CA for AWS IoT. Right Click this link and open it in a new tab and contains various options for the root CA certificate that we need to trust in order to gain secure connectivity to AWS IoT services.
Although RSA is getting a slightly bad wrap these days, AWS have a 2048 bit RSA key certificate listed along with some Euclidean Curve (ECC) key certificates. ECC keys require considerable more processing effort than RSA - so stick with the RSA key certificates where you can.
For this tutorial, I am going to get the 2048 bit RSA AWS Root CA.
Download the AWS Root CA and keep it alongside the other certificates.
In the original certificate page, Click Activate on the certificate, so that the box now changes to Deactivate. The certificates are now active.
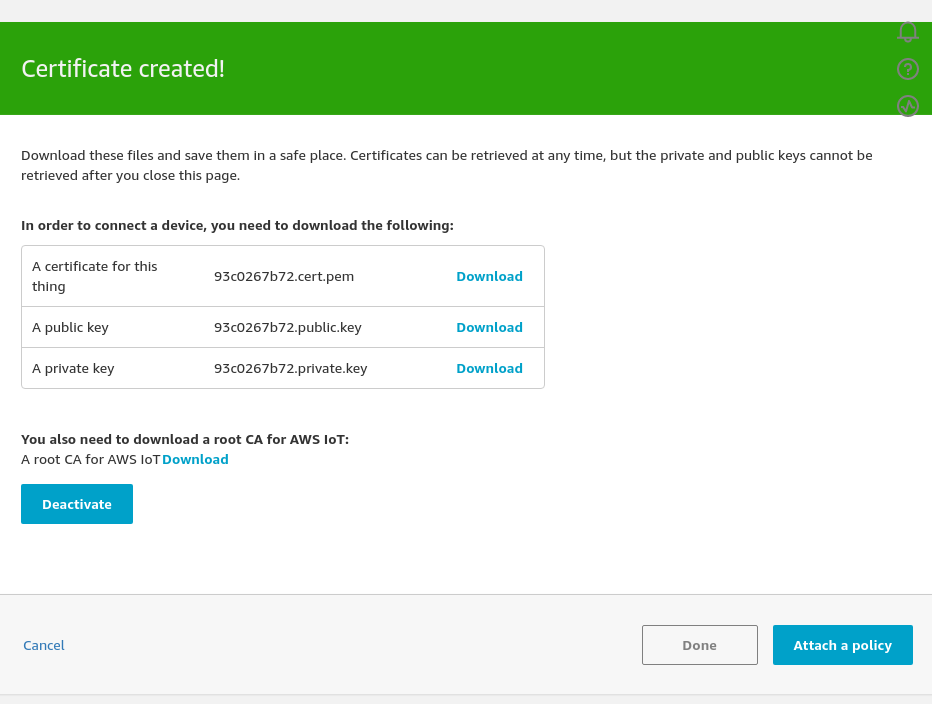
Click Done, because we cant' yet Attach a policy as we've not created any IoT policies yet.
Security Policy
From the main screen, in the left-hand navigation pane Click Secure and then Policies from the Secure sub-menu to start creating a new security policy which we will attach to the certificate we've just created.
Together the policy and the certificate will give the new IoT thing permissions to do something (Usually subscribe to and publish to MQTT channels).
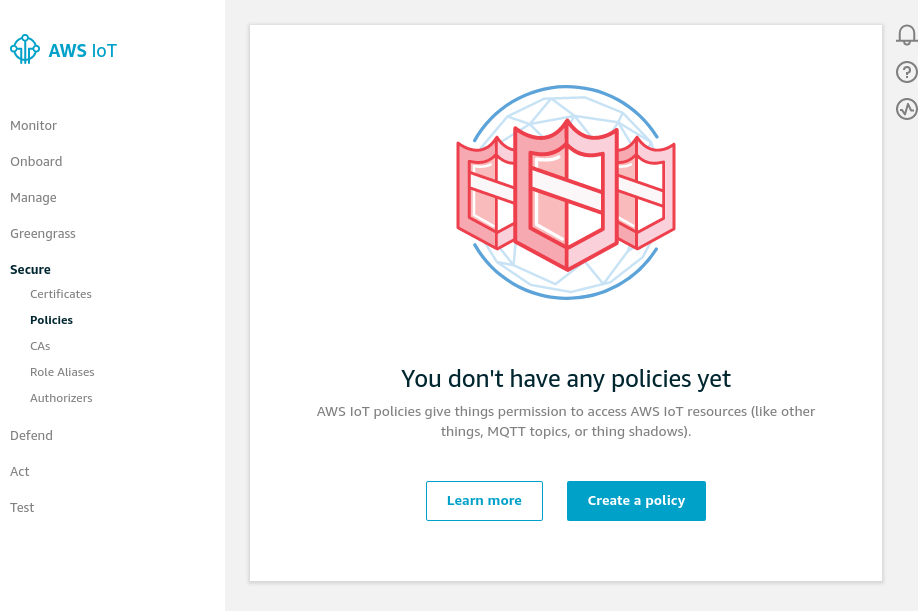
Click Create a policy which will be our first policy.
Give the policy a meaningful name. For the purposes of this tutorial I'm going to call this policy ESP32ExamplePermissions which is a bit poor as it doesn't describe what the policy does. Generally a policy should hint at what it provides rather than be device-specific. But, as we're just working through getting something up and running that we can tweak with later, this will be fine.
Specify the Action as iot:Connect and then leave the ARN set automatically. The ARN has a set format which includes a region and your account number.
Set the Effect to Allow.
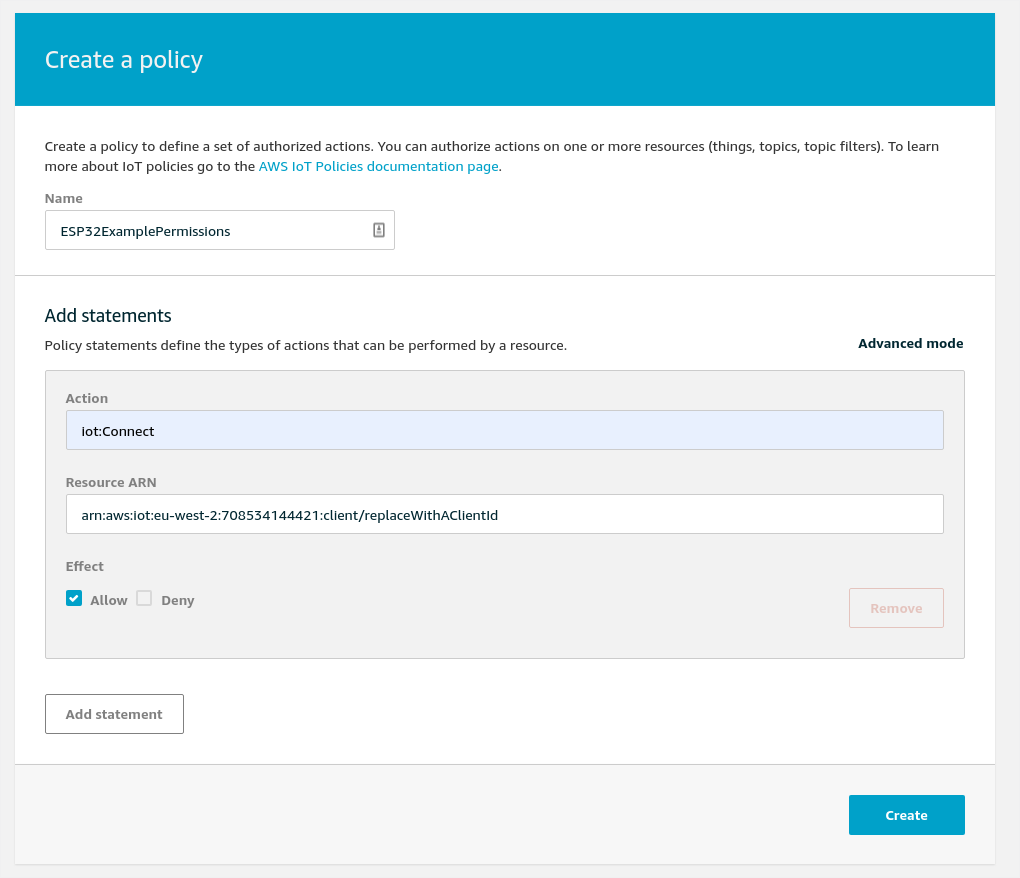
Now - move to the advanced mode (Click Advanced...) - this allows us to paste in the JSON source for this policy. The reason for doing the first one is to
We will adjust the ARN to be dynamic so it's not tied to one thing. This saves us tying the policy to a device-specific ARN. Replace the
{
  "Version": "2012-10-17",
  "Statement": [
    {
      "Effect": "Allow",
      "Action": "iot:Connect",
      "Resource": "arn:aws:iot:<region>:<account>:client/${iot:Connection.Thing.ThingName}"
    },
    {
      "Effect": "Allow",
      "Action": "iot:Publish",
      "Resource": "arn:aws:iot:<region>:<account>:topic/$aws/things/${iot:Connection.Thing.ThingName}/shadow/update"
    },
    {
      "Effect": "Allow",
      "Action": "iot:Subscribe",
      "Resource": "arn:aws:iot:<region>:<account>:topic/$aws/things/${iot:Connection.Thing.ThingName}/shadow/update/accepted"
    },
    {
      "Effect": "Allow",
      "Action": "iot:Receive",
      "Resource": "arn:aws:iot:<region>:<account>:topic/$aws/things/${iot:Connection.Thing.ThingName}/shadow/update/accepted"
    },
    {
      "Effect": "Allow",
      "Action": "iot:Subscribe",
      "Resource": "arn:aws:iot:<region>:<account>:topic/$aws/things/${iot:Connection.Thing.ThingName}/shadow/update/rejected"
    },
    {
      "Effect": "Allow",
      "Action": "iot:Receive",
      "Resource": "arn:aws:iot:<region>:<account>:topic/$aws/things/${iot:Connection.Thing.ThingName}/shadow/update/rejected"
    }
  ]
}
We now have to attach the Policy to the Certificate we created earlier for the IoT Thing.
Click Secure->Certificates from the left hand navigation pane. We can see the certificate that we created a few steps ago for our first IoT Thing. Hover over it and click the checkbox on the certificate. From the Actions menu that appears, select Attach Policy
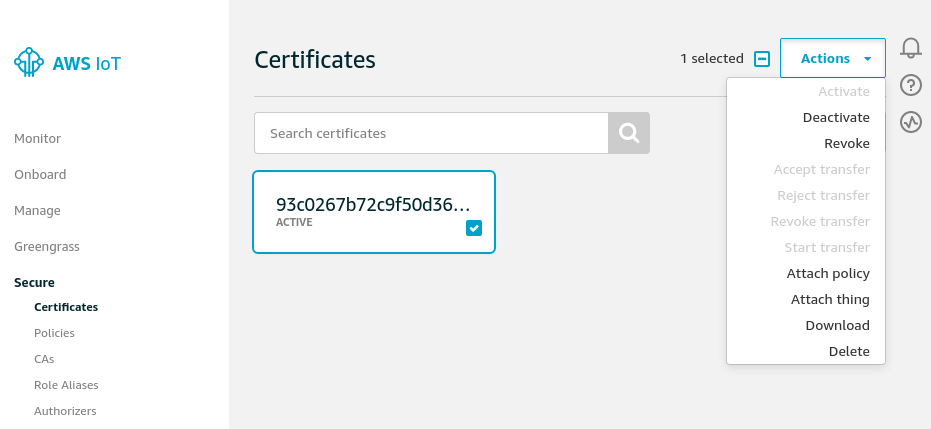
From the dialog that opens, select the new policy that we just created, ESP32ExamplePermissions:
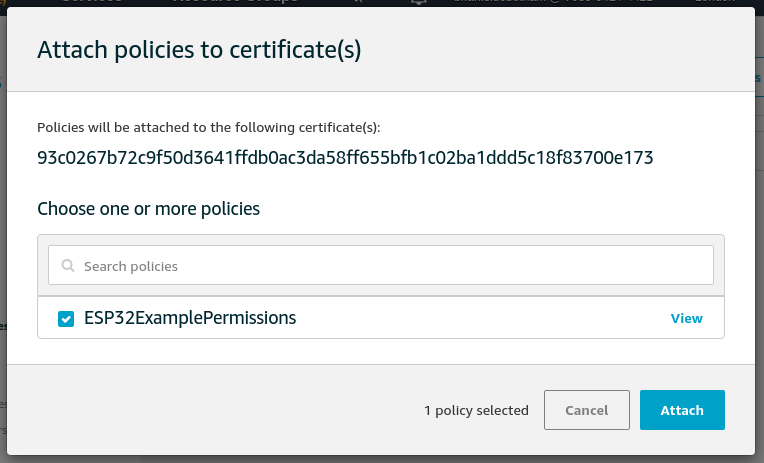
Click Attach and we get a confirmation toast that the policy has been attached successfully.
Now that the security policy is attached to the certificate, we need to attach the certificate to the Thing.
From the Actions menu for the certificate which should still be available (If it isn't, select the certificate again as above) select Attach thing
From the dialog that opens, select the Thing that we created earlier.
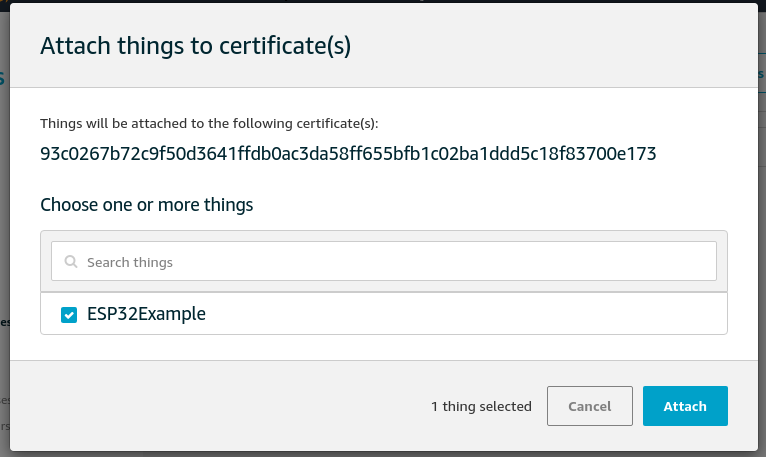
Click Attach and we get another toast message saying that the certificate was attached to the Thing successfully.
IoT Core URL
From the AWS Documentation of IoT Core we can see that to find the URL and port number that MQTT should connect to for our new thing, we should use the describe-endpoint command. This command is run against your AWS account by using the AWS CLI tool and an AWS Access Key (With sufficient permissions to describe-endpoint)
Create IAM Access Key
Tip
You can skip this section if you've already got an AWS Access Key and the AWS CLI tools.
We need to create an Access Key which will allow an IAM user to perform programatic tasks on our AWS account. If you're still using the root account credentials to do things - STOP! Change to make yourself an IAM administrator role and don't bother logging in as the root account any longer.
In the AWS Console select the IAM service and click Users, following by the User which you currently use within the AWS Console. From the user summary page, click Security Credentials and then Create access key.
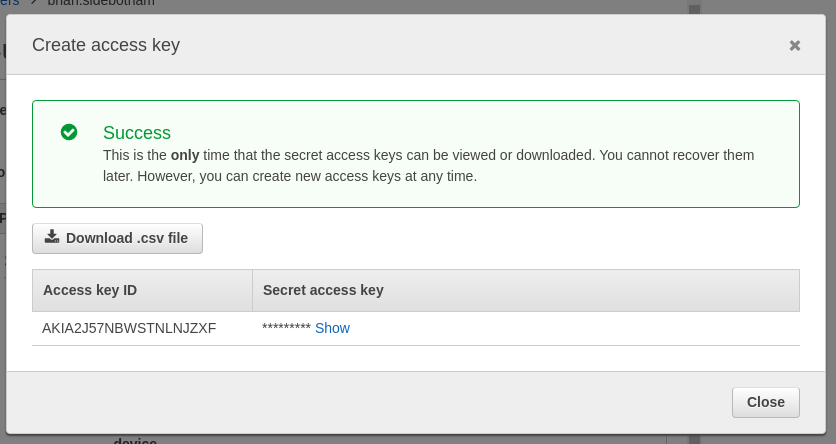
You need to click Show to be able to see the Secret access key and you need to put that somewhere safe. I recommend some secure password vault like Lastpass or else Hashicorp's Vault.
Close when you've copied out the access key id and the Secret access key.
We need the aws CLI tools. I'm working on Fedora, so I do dnf search aws to find the package which it turns out is awscli and so I can install the package with sudo dnf install awscli.
In order to use the AWS CLI tools, you have to inform the AWS CLI tool about the access key that enables it to access your account. This is easiest done by using the configure command:
[brian@brian-2920x ~]$ aws configure
AWS Access Key ID [None]: AKIA2J57***********F
AWS Secret Access Key [None]: I**************************************E
Default region name [None]: eu-west-2
Default output format [None]:
Make sure you paste in the secrets here. On Linux this stores your AWS secrets in plain text in a file in your home directory ~/.aws/credentials - which is why these days I always have drive encryption enabled for my home folder. At least at rest the information on the disk is encrypted!
Use describe-endpoint
Using the AWS CLI you can get the account-specific URL endpoint for your IoT. From the documentation for the AWS IoT describe-endpoint command, we will use the endpoint that returns an ATS signed data endpoint. This works with the AWS root certificate we collected earlier. If you want to use a Verisign signed endpoint instead, you'll have to adjust the Root CA you use. In this tutorial we'll use ATS signed.
$ aws iot describe-endpoint --endpoint-type 'iot:Data-ATS'
{
    "endpointAddress": "a2**********3d-ats.iot.eu-west-2.amazonaws.com"
}
This URL is the endpoint we'll configure our Thing to connect to MQTT. According to the documentation port 8883 is used for secure MQTT connections on this URL.
Connect to AWS IoT to Publish MQTT
Now we should have everything we need to connect to AWS IoT with our new thing and we should be able to subscribe to and publish messages to the same topic.
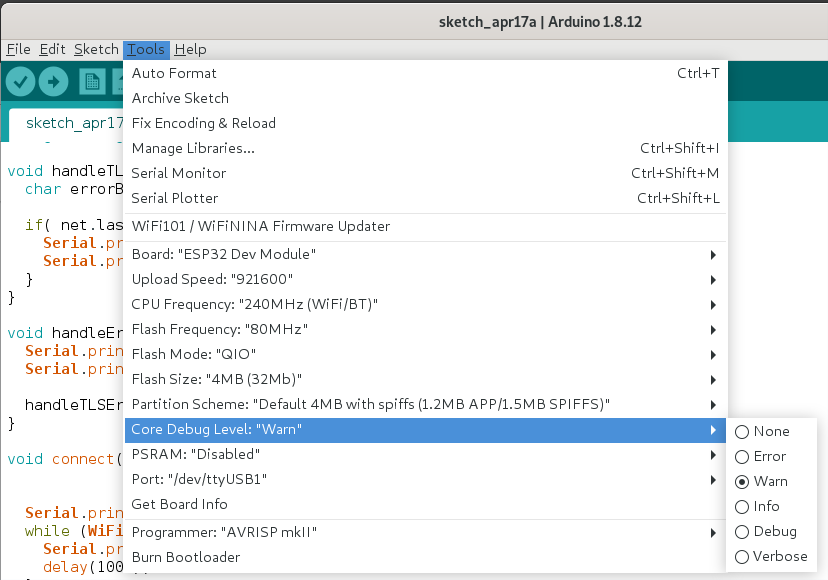
As things in the Sketch get more complicated, we want to make sure we see output from any libraries we're using. Make sure to set the Core Debug Level setting to Warning or more verbosity so you can debug issues more easily:
140-esp32-arduino-mqtt-connect-to-aws-iot.ino
140-esp32-arduino-mqtt-connect-to-aws-iot.ino is a new sketch that includes the AWS configuration data that we've collected while setting up our AWS IoT service.
In order to use the sketch, you'll need to fill in your AWS IoT ATS endpoint and the Thing Certificate and Private Key that you gathered earlier. If you've used all the same values as me you can leave the rest alone, otherwise you'll have to adjust the topic and/or device name.
Setting AWS Root CA
Setting Thing Certificate
Setting the Thing Private Key
Beginning MQTT Client a2**********3d-ats.iot.eu-west-2.amazonaws.com:8883
checking wifi...connecting...
connected!
Subscribing to $aws/things/ESP32Example/shadow/update
Subscribing to $aws/things/ESP32Example/shadow/update/accepted
Subscribing to $aws/things/ESP32Example/shadow/update/rejected
Publishing State...
incoming: $aws/things/ESP32Example/shadow/update/accepted - {"state":{"reported":{"color":"red","power":"on"}},"metadata":{"reported":{"color":{"timestamp":1587417221},"power":{"timestamp":1587417221}}},"version":159,"timestamp":1587417221}
The topics that are used in this example come from the AWS IoT documentation and are special reserved MQTT topics which allow IoT to keep a shadow copy of the Device's state. It is common to have this sort of shadowing for the device. If, for some reason the real device is not available, services will get the shadow device data instead.