2009-06-24 - 2009-06-24 Making the dry sump pan
I decided to get the TIG out and finally get on with the dry sump pan for my 2.5ltr V6. Lee had some spare fittings from his Pace dry sump which are pretty cool, they have a gauze filter inside a "pickup" tube which is then screwed through the sump pan. It's probably easier to just look at the photos of them!
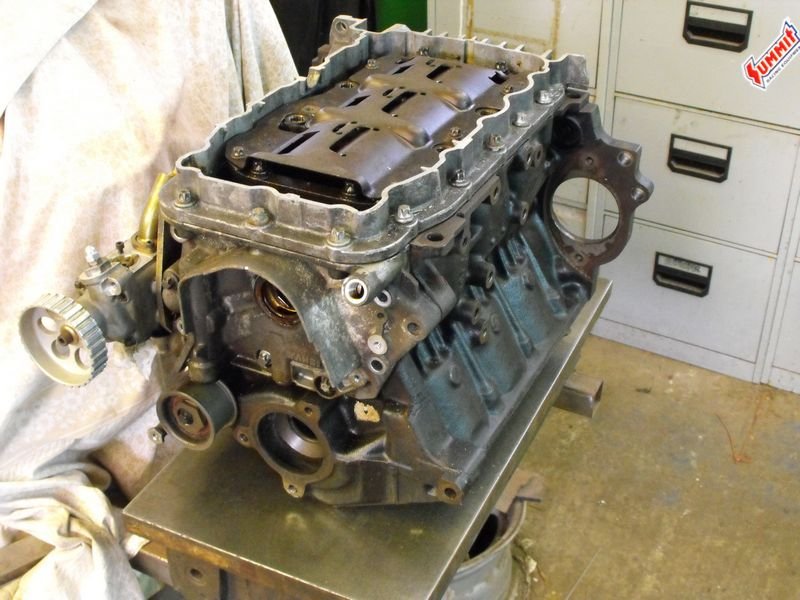
I started off by milling down a Vectra sump. I think I milled it down to about 35mm, this clears everything that is under the engine. I have the subframe cutting across the front of the engine, right under the sump so I need to keep the sump as low as possible at the front of the engine.
With what was left of the sump pan bolted to the block I chucked the block on a welding table and started rough cutting some 2mm aluminium to make the bottom of the dry sump pan. Luckily the windage tray bolts directly to the main cap girdle, so the sump pan is litterally just an oil catcher! I started off by cleaning all the aluminium. I cleaned the sump with thinners to get as much oil off the pan as I could, and then I gave everything a good scrub with a stainless wire brush. It is vital to get rid of all aluminium rust before trying to TIG anything.


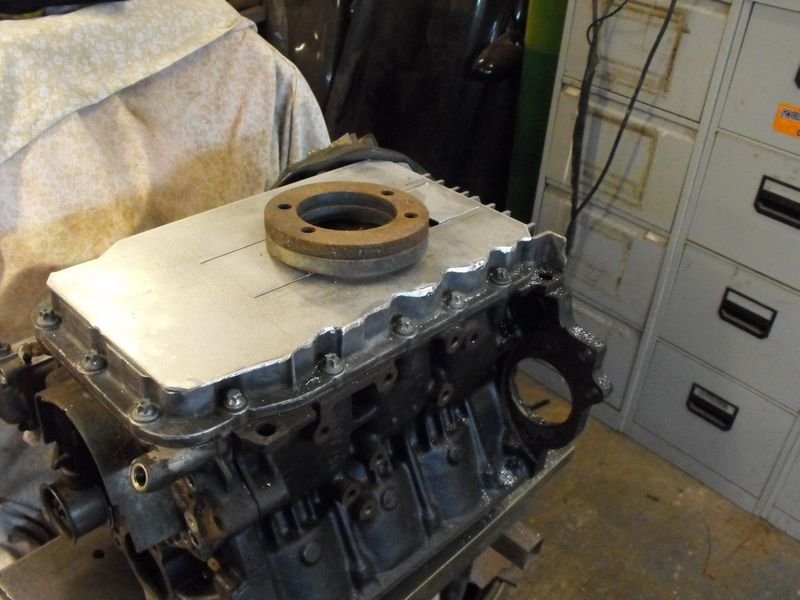
Once I had the rough size done, I did a couple of tack welds to hold the plate in plate, and then profiled the plate with a die grinder to the same shape as the sump pan. It was then the moment of truth, to start welding!!
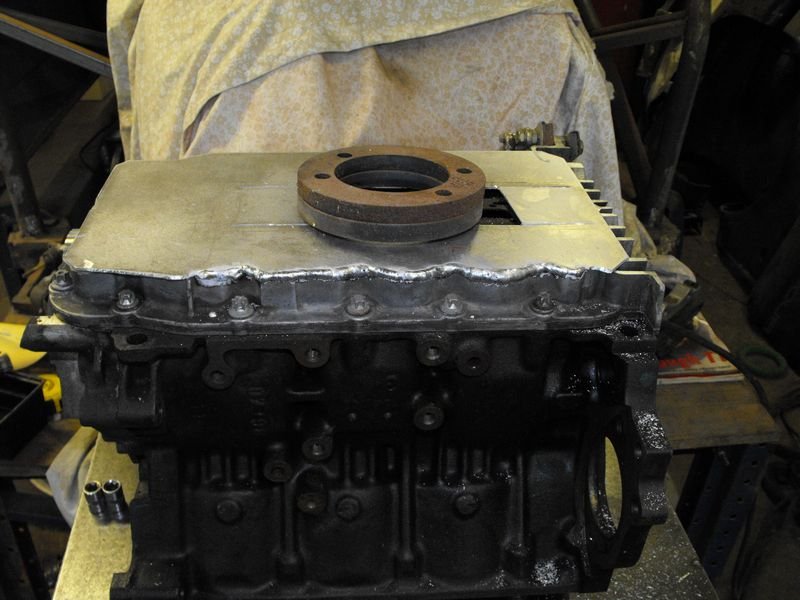
I started off with an already balled white tungsten (about 2.4mm dia.) and I was using a 2mm (I think! I must check that) filler rod. I started at 70amps, this turned out to be a bit less than I needed, so I moved to 80amps. This was fine, but unfortunately I don't have an adjustment (pedal or finger control) for the current, so I could only go so far before the heat soak meant that the current was far too high. Then I would have to stop, wait a 30 seconds and start again. I think I'll definitely get a foot pedal for Matt's TIG. It would be very useful for ali. Initially, the heat arc was hard to predict and seemed a bit scattered. After a while I decided to snap the tungsten to weld with a new end, this helped a lot and when it had balled this new end was very concertrated and worked really well. I also moved the tungsten so that is was protruding about 2mm out the end of the shroud. Gas was Argoshield.
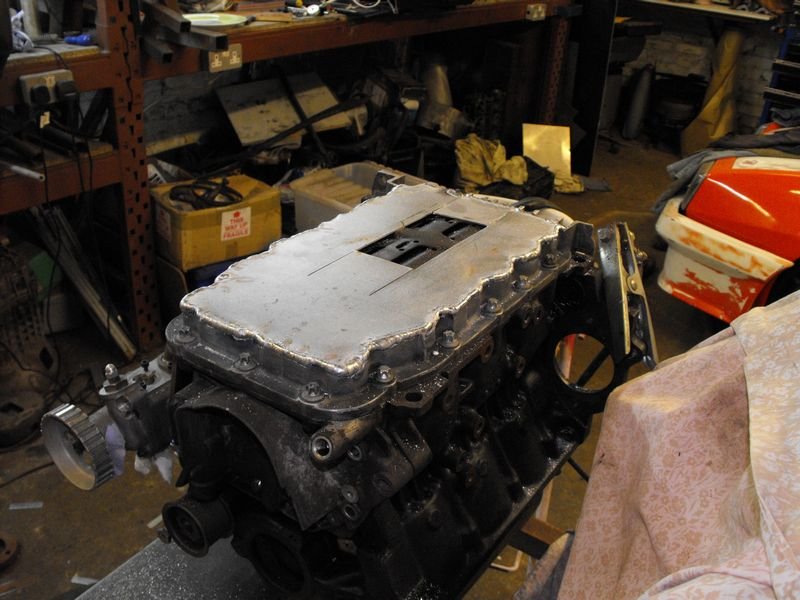
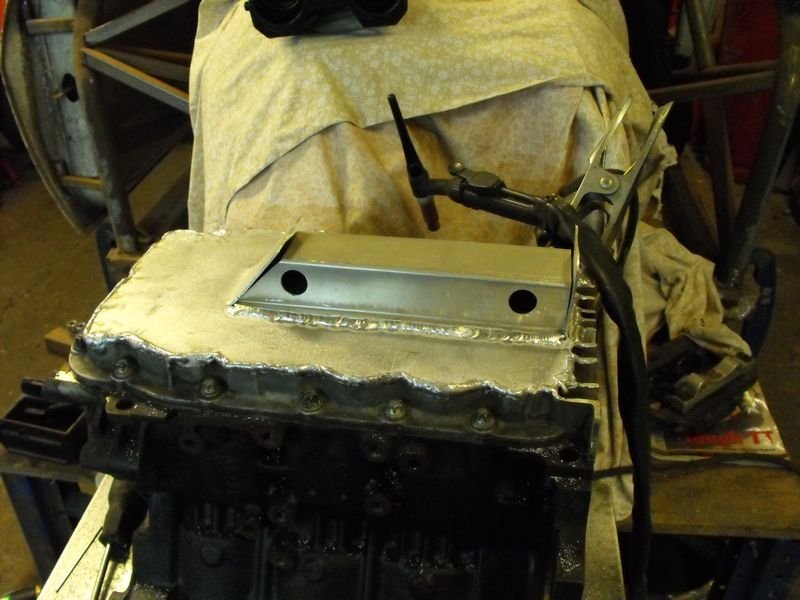
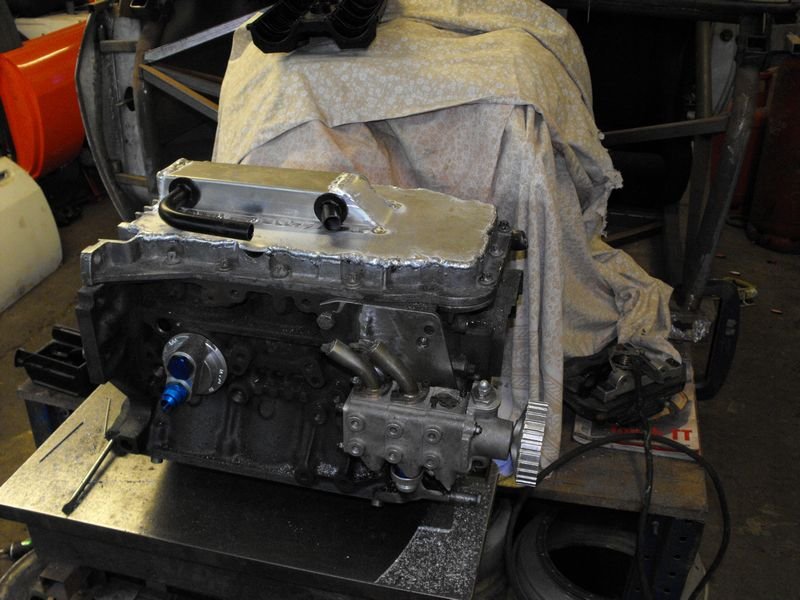
In the end, the pan came out okay. There are a few places where I could have done better, but then this is the first time I've TIG welded ali (at least without trying to use a stainless filler rod by accident!!) and everything looks tidy enough and looks like it won't leak oil everywhere. Looking forward to bolting the engine back in now and getting on with the exhaust manifolds!